If you want to start working with metal, copper is a fantastic place to begin!
There’s a reason that the copper and bronze ages came before the iron age! Copper is a soft metal and is easy to work with. That makes it a great choice whether you’re already a blacksmith with an extensive amount of experience working with iron or steel, or even if you’re brand new when it comes to metal working.
Historians believe that copper is one of the first metals that humans used because of how soft and easy it is to shape. Coppersmiths are one of the few trades mentioned in the Bible, and it’s thought that people have been using copper for over six thousand years!
You may already have some spare copper laying around. If not, you can buy some cheap scrap copper to get started with. You can create both decorative or practical copper items. Either is an enjoyable project!
If the idea of heating pieces of iron or steel to red hot temperatures intimidates you, you’re in luck. Copper can be cold worked and there’s often no need to heat it up.
With a little learning and practice, you can become a proficient coppersmith, which is also known as a redsmith due to copper’s reddish hue.
In this article I’ll teach you the different tools and techniques you’ll need to use to start making your own copper items. I’ll give you some ideas of copper projects to get started with as well.
What’s The Difference Between Copper, Bronze, And Brass?
Before you start working with these metals, it’s important to know the difference between them so that you can identify them. Each has different characteristics and needs to be worked differently.
If you aren’t sure what kind of metal you’ve got, the simplest trick can be to scrape a little bit of the metal. If the exposed metal is yellowish, then it’s either bronze or brass. If it’s pinkish, then it’s copper.
It can be difficult to tell bronze and brass apart without chemical analysis though, so this is just a guide.
Copper
Almost everyone knows what copper looks like if you’ve held a penny before. It has a unique reddish color to it.
Copper is still widely used in houses today because it’s a strong material that’s good at conducting heat and electricity. It’s also able to resist corrosion if properly treated.
You’ve probably seen copper pipes and pipe fittings in your own home if you’ve done any kind of DIY work.
Copper can be easily brazed, soldered, or welded. It can also be buffed and polished to almost any level of shininess and texture that you want.
You can get two main forms of copper. Oxygen-free grades copper is used where a highly conductive and ductile material is needed. Unalloyed copper are lesser grades of copper that contain varying amounts of impurities.
Brass
Brass is an alloy made mainly from a mixture of copper and zinc.
It can range in color from red to a yellow color depending on how much zinc is used in the alloy. Adding more zinc provides the alloy with more ductility and strength.
Brass containing over 39% zinc has a lower ductility and higher strength at room temperature.
Brass with zinc content ranging from 32% to 39% is easier worked while hot, but is much harder to cold-work.
Brass is mostly used to make musical instruments or for decorative purposes.
Bronze
Bronze can look quite similar to copper or brass if you don’t have them side by side. You can tell the difference because bronze has faint rings on its surface. Bronze also tends to be more of a dull gold color. Although it can also be as reddish as some copper, eventually fading to a dark brown with age.
Bronze is another type of alloy made primarily from copper. Instead of containing zinc like brass does, it usually contains tin. But it may contain aluminum, silicon, phosphorus, arsenic, and other compounds.
Bronze is much harder than pure copper.
Brass Plated Iron
Sometimes iron can be plated with copper or brass. Before you start working with something that you suspect is copper or brass, I’d check it with a magnet first to make sure.
How Is Working With Copper Different Than Iron Or Steel?
If you’re already a blacksmith, then you might just be interested in the main differences between working with copper and ferrous metals like steel or iron.
Copper Has A Different Melting Point
Pretty much every type of metal has a different melting point. So it’s no surprise that copper and iron vary in melting points.
Pure copper melts at about 2,000 F (1,090 C.)
Bronze tends to have a lower melting point than pure copper. That’s because bronze is often made by combining copper with tin, which has a melting point closer to 450 F (230 C.) When you mix the two metals together, you get a melting point that is somewhere in between the two.
Copper Can Be Worked Without Heating
Copper can be worked without needing to be heated up. That’s because it’s considered a soft metal.
Cold working copper hardens the metal by compressing its molecules, resulting in a harder final product. However, copper can become brittle and start to crack if it’s overworked.
Copper Can Be Cooled Slowly Or Quickly
Heating the copper up allows the molecules in it to align themselves in a more organized way, which allows for easier shaping of the metal.
To help prevent cracking, copper is annealed before it’s cold worked. Annealing is the process of cooling metal to toughen it and remove internal stresses.
Copper can either be annealed by quenching it, or rapidly cooling it by plunging it into water. Or you can allow it to slowly cool in air. Either way the copper will become annealed.
This is different from iron or steel, which need to be cooled slowly for them to be annealed.
What Tools Do You Need To Work With Copper?
Many of the tools that you’ve already got for blacksmithing will come in handy for working with copper. These include a ball peen hammer and other types of hammers, and a vise or set of tongs.
For copper work, sometimes different types of anvils are used. These include dome anvils, slope anvils, round anvils, and square anvils. But for basic copper work you can probably get by with any existing anvil that you’ve already got for blacksmithing.
Copper requires some more specialized tools that you might not already have though.
For cutting sheets of copper, you’ll want metal shears. Sometimes also called tin snips. You may also want a jeweler’s saw.
A leather sandbag is sometimes also used for working with copper.
A scribe and compass are useful for marking your work. Since copper is such a soft metal, you can scratch and etch designs into it before you start cutting or working the metal.
For more gentle work you may want a wood forming mallet or a horn mallet as well.
A buffing or polishing wheel is also a great way to really make your finished pieces shine.
If You Want To Keep It Simple
You’ll need all of the tools above for more complicated copper work. But really it’s one of the simplest metals to work with.
To get started, all you really need is a forge (or even just a blowtorch), a hammer, and an anvil.
What Safety Precautions Should You Take When Working With Copper?
When working with copper, you should take all the same precautions you take when working with steel or iron. That includes things like eye and hearing protection, an apron, and a respirator which you can check out on my Recommended Products page.
When working with heated copper, brass, or bronze, it’s even more important to make sure that you’re in a well-ventilated area. Particularly with brass which can contain high levels of zinc.
Zinc causes a respiratory condition known as metal fume fever which can cause very unpleasant flu-like symptoms at the lower end, and potentially even death at the higher end.
Even working with pure copper can have a similar irritating effect on your lungs.
To avoid issues, I’d try to cold work copper as much as possible. When you do need to heat it, be sure to do it in a well-ventilated area and while wearing a respirator. Working with brass is such a risk due to its zinc content that I’d simply avoid it.
For more information on metal fume fever, check out my article on working with galvanized steel.
What Can You Make From Copper?
Copper is actually a pretty versatile metal and can be used to create a wide range of objects.
When you’re starting off, I’d recommend just trying to make simple objects and shapes like animals and flowers. That will give you some practice using different tools and techniques, adding texture to your work. You’ll learn the basics of working with copper better from trial and error than by simply reading books in many cases.
Once you’re more comfortable shaping and forging copper, there’s almost no limit to what you can create.
If you’re looking for project ideas, try some of these:
- Copper jewelry
- Sculptures and decorative items
- Weather vanes
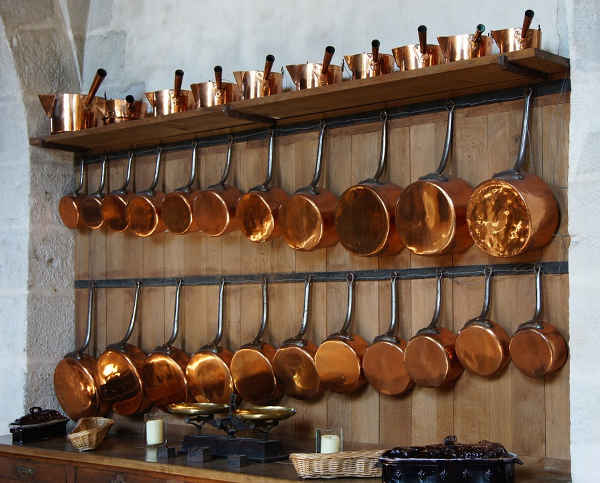
- Plates, trays and cookware
- Coffee and tea pots
- Vases and jugs
- Kettles
- Watering cans for your garden
- Copper mugs (great for drinking Moscow Mules out of!)
- Ladels and funnels
Copper Working Techniques
During the Copper age, copper was typically cast into the general shape of an object and then hammered while cold to shape and harden the metal. You can use a similar technique as an amateur modern redsmith.
To anneal copper, you only have to get it to a glowing dull red color. It’s a good idea to anneal it a lot if you’ll be cold forging, as it will help prevent cracking while you’re working the metal. Every time copper gets heated above a specific temperature, it gets annealed.
Forge Welding
Forge welding copper is technically possible, but quite difficult.
There’s a narrow range between where copper is separate, able to be welded, or will simply melt. For beginners, forge welding isn’t a good choice and I’d recommend sticking with casting and cold forging.
Lockseams
There are many ways to join pieces of copper together, but I find the easiest is using lockseams.
Lockseams are created by folding a narrow piece of copper from each piece that needs to be joined so that they interlock, and then soldering the joint so that it becomes watertight and permanent.
Brazing
Before hard solder became available, brazing was used to join pieces of copper together.
Brazing is done with a filler made of high-zinc brass which has a lower melting point than pure copper. However, it can be difficult to make a neat brazing joint compared to other joining methods.
In modern times, brazing has pretty much entirely been replaced by welding. But if you aren’t comfortable using a MIG welder, or just want to be historically authentic, then you might give brazing a try.
Spinning
Spinning involves putting a piece of copper onto a lathe. While the copper rotates, you can use a wooden tool to apply pressure and gradually shape the copper. This technique is commonly made to create copper bowls.
Deep Drawing
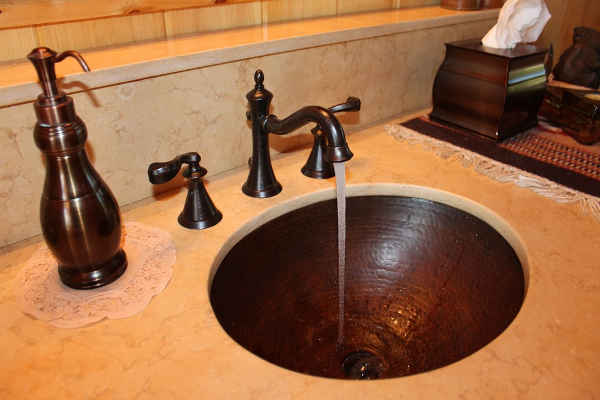
Deep drawing is a metalworking method still used today to create objects like soda cans, aluminum cans, and even metal sinks.
We can still use it for working with copper as well though. It’s a way of creating straight-sided objects without any need to join separate pieces together.
Deep drawing starts with circular pieces of copper that are cut from sheets. They are then forged over a die to create the desired shape.
Riveting
Copper rivets can be used to fix handles onto copper vessels, such as on watering cans or tea kettles. This creates a strong joint.
Polishing
When you’re done heating up copper, you’ll likely have a layer of oxide on it that will need to be removed. You can take this off quite easily with steel wool or a scotchbrite pad.
To get a mirror finish on your copper, you can use more advanced polishing techniques.
It’s also good to prevent getting dents in your copper while you’re working it. You can avoid this by making sure your tools are free of any big dents or marks. Since copper is such a soft metal, these imperfections in your tools or anvils are easily transferred to your final work.
Forging Copper – Tips And Tricks
Try different methods and techniques. Don’t just rely on the conventional techniques that you already know from working with iron or steel. Try different ways of working with copper to create different effects. You can practice on scrap pieces of copper before applying it to a finished project.
Learn from your mistakes. If you aren’t able to fix mistakes in your current project, at least learn from them to avoid repeating them in the future. Don’t become disheartened if your first few projects don’t turn out exactly as you wanted them to. It’s a learning process!
Start with pure copper. Before moving on to harder metals like bronze or brass, start off using soft copper.
Anneal frequently. When you’re working copper and you start to feel it harden, anneal it by heating it to a dull red color and quenching it in water. This will make it softer and easier to continue working. Plus it will help prevent cracking. Just be sure to use care and avoid splatter when you plunge the copper into water.
Don’t be afraid of the copper. Working with copper can feel very different from working with iron or steel. The first few times you hit copper, you might notice a crumpled look to the metal which can seem like you’ve ruined it. But keep hitting it! It won’t take long for that crumpled looking piece of metal to smooth back out. With time you’ll learn to gauge the amount of power you put into your hammer to avoid distorting the metal.
Conclusion
There’s a reason that our ancestors started working with copper before any other kind of metal. Overall, copper is a pretty forgiving and flexible metal to work with. Plus it’s affordable as a raw material.
If you’re brand new to metalworking and the idea of blacksmithing still seems a bit intimidating, starting off by working with copper can be a great stepping stone to get you into the craft.
Want to learn more about working with copper? I’d recommend checking out The Complete Metalsmith by Tim McCreight which is a great reference for many techniques and other skills that will help you out.
Have you ever tried forging or working with copper before? Let us know about your experiences in the comments section below!