
Getting started with blacksmithing isn’t all that hard. In fact, I’d say you can start with just 5 tools.
What are the 5 tools every beginner blacksmith needs to get started? You’ll need a forge, an anvil, a hammer, tongs, and a vice. Most of these you can buy used or make yourself for just a few hundred dollars. One of the coolest things about blacksmithing is that once you have the basics, you can forge any additional tools you need as you go!
Some of these blacksmithing tools can be hard to find. So in addition to which tools you’ll need, I’ve also listed where you’ll likely have the best luck finding them, as well as some alternatives.
There are hundreds of specialized blacksmith tools and gadgets out there. Most of them are nice to have, but in this article I’ll be discussing only the absolute essentials that you’ll need to start forging metal.
Want to see what stuff I’d suggest? Check out my recommended gear page!
A Forge
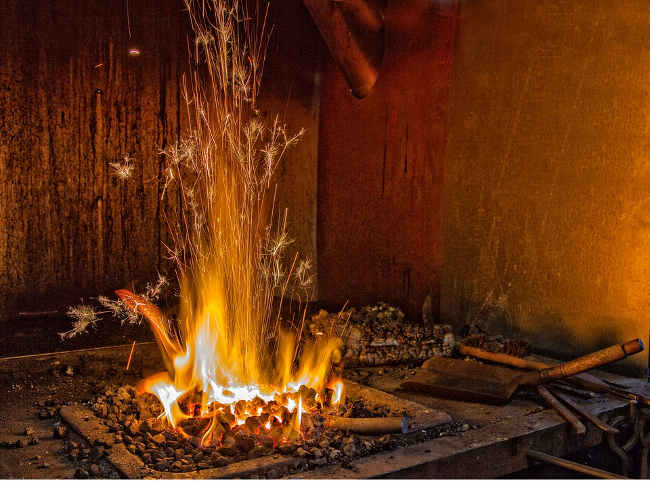
The first thing you’ll need to start blacksmithing is a forge. It’s where you’ll heat up your work.
Without something to heat your metal up to workable temperatures, bending and shaping it would be nearly impossible.
If you’re using a traditional blacksmith’s forge that uses coke or coal to generate heat, your forge will need to consist of three parts:
The first is firepot, which holds the fire and generates the heat. It will need to be four or five inches deep.
The second is a work surface, which ideally would be made of firebrick, but you can use regular brick or even concrete.
If you’re looking for cheap fire-resistant brick, go to hobbyist and ceramic stores. Ask for bricks that go inside kilns. You can usually get these way cheaper than purchasing ones made specifically for blacksmithing, and they work just as well.
Third, your forge needs some kind of blower or air source to add extra oxygen to the fire. In the past this would have been a bellows, but nowadays there are more efficient electric-powered options.
You can also get a makeshift blower from clothes dryers, air conditioning units, or other used appliances. Some people say that a hand operated blower still provides superior control when it comes to maintaining a proper temperature for your forge.
At its most basic level, you can make yourself a blacksmiths’ forge with an old brake drum and hair dryer if you’re really on a budget.
There are plenty of kits and plans for blacksmith forges that you can make yourself. Different models of ready-made forges that you can buy are also available. Some are gas forges that use propane or natural gas, removing the need for coal.
You’ll need to place your forge somewhere that’s very well ventilated. Ideally this would be outdoors, but at a bare minimum you’ll need a chimney to let all of your fumes escape. Inhaling coal dust can lead to all kinds of health problems and should be avoided at all costs. So proper ventilation for your forge is critical.
If you’re buying a pre-made forge, it will be one of the most expensive items you’ll need, along with your anvil.
An Anvil
Anvils are pretty much the first thing that comes to mind when someone thinks of blacksmithing. It’s the unofficial symbol of blacksmiths and something that’s been used for hundreds of years.
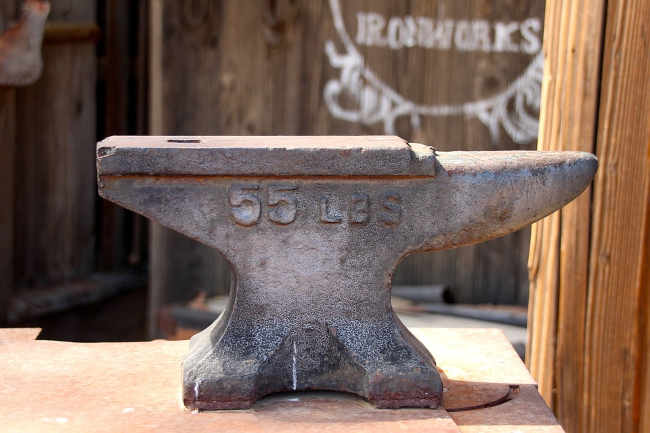
An anvil is basically just a flat, hard surface for you to work metal on. It’s where you’ll be doing all of your shaping and molding of your work. Usually an anvil will be made from steel or cast iron.
It’s best to start off with a used anvil, because a brand new one can be very expensive.
There are many different shapes of anvils available. A farrier’s anvil is probably the best one to start with.
What’s a farrier’s anvil? It’s the stereotypical shape that you probably think of when you picture an anvil. A farrier is traditionally a blacksmith that specializes in making horseshoes.
Instead of just a flat surface, a farrier’s anvil also has a horn that you can use to bend metal, as well as conveniently placed holes for punching through metal or adding attachments to your anvil.
You shouldn’t need to spend more than $1 or $2 per pound for a used anvil. That’s pretty much the standard price.
Don’t pass up an anvil just because it looks a bit used and has some marks on it. Usually you can resurface it or clean it up if you need to, and then it will be just as good as any other anvil.
Finding anvils can be hard. They’re made of expensive materials, and they’re kind of a niche item. They’re also super heavy, which makes ordering them online difficult because of the shipping costs involved.
A good place to start is to post an ad in the wanted section of your local newspaper. You might also find them locally at estate sales, farm sales, and farm auctions. Check Craigslist or Kijiji for your city, as well as antique shops too.
There are probably plenty of old anvils sitting around your city not being used. But people either don’t know what they’re worth or don’t know that people are looking at them since blacksmiths are pretty rare in our modern times.
An anvil will be one of the most expensive things you’ll need to start blacksmithing. A quality anvil is important though. It makes your work more efficient and reduces the risk of injuring yourself.
If you’re on a tight budget, it’s possible to make a beginner’s anvil from a piece of a railroad tie. Although the work surface will be small and difficult to work with. If you’re just getting into blacksmithing and aren’t ready to commit to the full cost of a real anvil, it might be something to experiment with just to get a feel for the craft.
Hammers
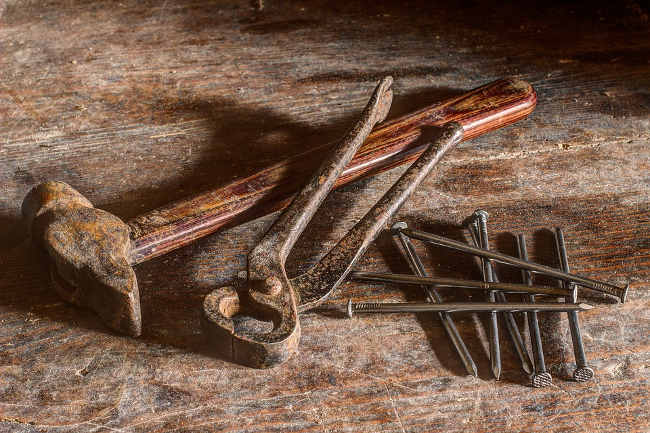
The kind of hammers you use for woodworking and carpentry aren’t going to cut it. While blacksmithing, you’re going to be striking and bending red hot metal. Your typical claw hammers aren’t designed to withstand heat and can crack easily under such conditions.
The most common hammers to start with for blacksmithing are a ball pein or cross pein hammer.
Hammers come in all different sizes and weights. A good weight for a blacksmith hammer is between 800 and 1,300 grams (1.7 to 2.9 lbs.)
Usually a hammer for blacksmithing has a longer handle and needs to be well balanced. It goes without saying that the head of your hammer needs to be firmly fastened to the shaft.
Luckily for you, unlike forges and anvils, you can find these hammers in pretty much any hardware store.
If you’re planning to do any forge welding (basically welding together two pieces of really hot metal by hitting them really hard) you’ll also need a heavier sledgehammer that weighs between 3 and 5 kg (6.6 to 11 lbs.) Although you can probably wait before you pick up one of these.
Once you’re a skilled blacksmith, you can even start to make your own hammers. So instead of picking up more specialized hammers, you can simply make them when the need arises. The shaft of old car axels can be turned into hammers pretty easily.
You should keep the face of your hammer polished so that it makes contact with your work evenly.
But let’s keep things simple. In terms of a hammer, all you really need is a blunt object that you can use to smash the metal you’re working on.
Tongs
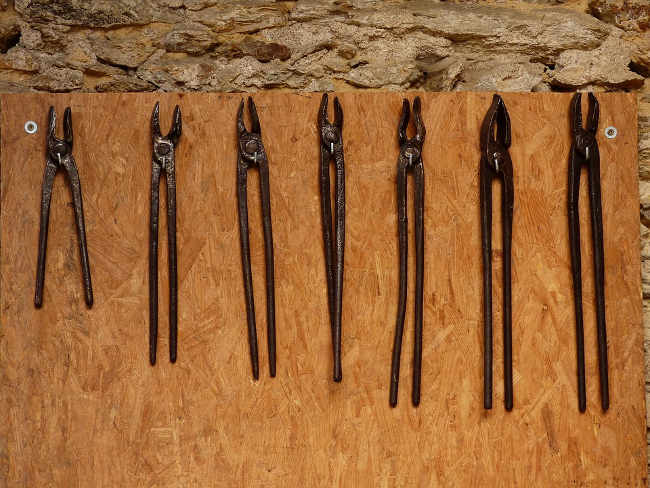
Tongs are a hinged piece of metal needed to firmly hold your work and keep it from slipping. The metal you’re working with is red hot, so keeping it in place is critical.
Think of tongs like a long, strong, fireproof extension of your arm.
Picking your first pair of tongs can be confusing. They come in so many different styles.
For example:
- V-Bit
- Wolf Jaw
- Flat Jaw
- Straight Lipped
- Bolt
- Pickup
- Snips
- Wedge
- Hammer
- Adjustable
- Round nosed
- Bow
- Box
- Plus many more!
So what tongs do you get to start?
You only really need one good pair of tongs to start. Then, like hammers, you can eventually craft your own custom tongs as needed with your newfound blacksmithing skills.
A medium sized set of tongs is good. Most things you start working on won’t need a large pair, and getting too small of a set of tongs can restrict the size of your work.
A good first pair of tongs for you might be some 16-inch V-bit tongs. It’s a good length, and this type of head is versatile no matter whether you’re making tools or knives, or doing some ornamental work. V-bit tongs can hold both square and round pieces of metal.
A Vice or Clamps
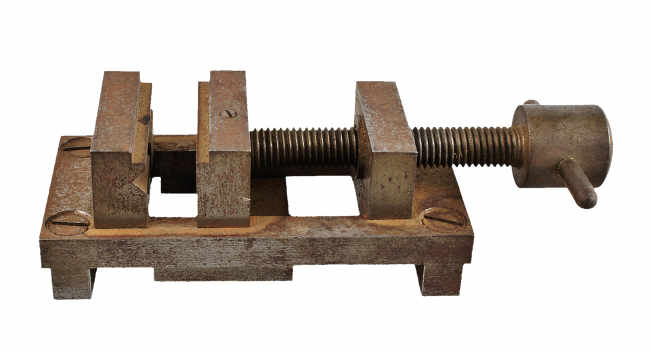
There are really two types of vices available.
The first is a machinist’s vice. They’re the smaller kind of vice that you probably have mounted to a workbench in your garage already. Unfortunately these kinds of vice aren’t great for blacksmithing work. Repeatedly hitting metal in these vices with a hammer can really damage them over time.
Instead, you want to look for a different kind of vice called a post vice.
These work off the same idea as a machinists vice basically. You turn a handle and the vice gets tighter or looser. But a post vice is much larger and stronger. They’re able to withstand a lot more of the kind of punishment you’ll be dealing out with your hammer while blacksmithing.
Like anvils, you can look for used post vices at estate sales or farm actions.
If you can’t find a post vice right away, you can start off with a machinist’s vice. But it’s best to get as large of a vice as possible. You’ll also need a vice that has smooth jaws, otherwise it will damage your work.
Conclusion
Blacksmithing is a rewarding hobby that doesn’t require all that much equipment to get started.
When you consider the startup costs of other hobbies like woodworking, photography, archery, or playing a musical instrument, blacksmithing is pretty similar.
It’s a skill you can continue to learn and use for your entire life. Plus you can literally use it to build your own tools!
With just the 5 simple tools I discussed above, you’ll be well on your way to becoming a master blacksmith.
If you feel a bit overwhelmed with where to start, you can check out my recommended gear page for the basics.
Related Questions
Q: Can I use stone as an anvil?
A: Some harder stones like granite can be substituted for a cast iron or steel anvil if absolutely necessary. But it’s not ideal. First you’ll need to completely flatten the surface of the rock, which is no easy task. Using granite as an anvil has many downsides. It doesn’t have the same bounce to it as metal, and it’s more likely to crack or chip when you strike it. There’s a reason anvils are made out of metal!
Q: Can I use my kitchen oven as a blacksmith’s forge?
A: No way! Cooking ovens can usually only get up to about 500 degrees F. That might be hot enough to temper steel, but it’s nowhere near hot enough to get a piece of iron red hot to the point that it will be malleable enough to work with. Plus it’s just not a good idea to try forging stuff indoors.